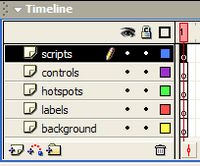
Double-click on the label for Layer 1 and
rename it to scripts.
Create 4 more layers, naming them hotspots,
labels, controls and
background.
Drag the layers by their icons so that they are in the order
shown.
The advantage of all this organisation is that each element
of the movie is clearly defined and can be manipulated independently.
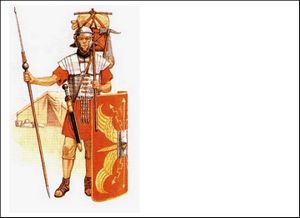
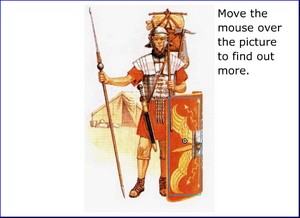
Click into Keyframe 1 of the layer background.
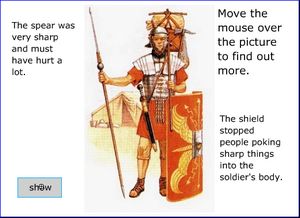
Import the soldier.jpg image to the stage.
It should fit nicely in the middle of the 550 x 400 default
stage size. If you need to change the stage size, click on
an empty bit and alter its size in the properties pane.
Nudge or drag the image across to the left of the stage.
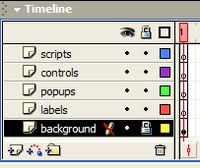
Then click on the lock/unlock option in the background
layer.
A closed padlock icon will appear in the layer's information
area and the image will then stay where you put it unless
you unlock the layer. You cannot accidentally alter it.
Locking layers does not alter their appearance in the movie
but it does save you a lot of time rescuing objects that have
been deleted or moved!
The show/hide option beside it is also worth experimenting
with when the stage gets a bit cluttered.
The 1 frame movie
Click on fame 1 of the labels
layer.
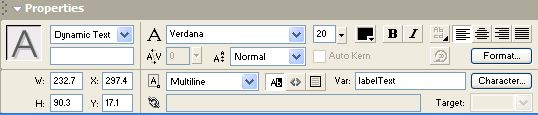
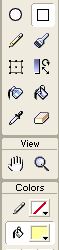
Select the text tool from the toolbar and use it to draw
a text box on the stage to the right of the soldier image.
Look down at the properties pane and set the text properties
to a suitable font, size 20, suitable colour, Multiline, Dynamic
Text and finally with labelText in the Var:
box.
By setting the text box type to Dynamic Text, the box will
display the value of a variable called labelText,
automatically updating it whenever the variable's value changes.
A variable is a sort of named
box that flash uses to store, display and use values as the
movie runs.
The labelText variable will hold a line
of text (called a string) that changes as the user points
to different parts of the picture.
You will now set the starting value for the
variable using you first bit of ActionScript. This is a programming
language that is used to control the movie as the user interacts
with it.
Click on frame 1 of the scripts layer and
then press F9. The Actions pane will then
appear.
Click on the View Options icon on the right
of the pane and select Expert Mode. This
lets you type into the pane directly.
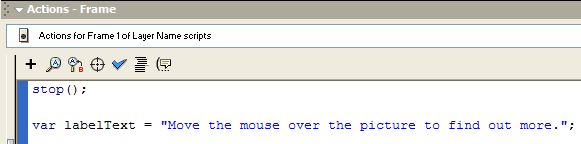
Now type the following into the actions box.
The first line is a command that
instructs the movie to stop running and wait for the user
to do something.
The second line creates a variable called labelText and then
places the text between the double-quotes into it.
Press F9 again to hide the actions pane.
You will see a small letter a in frame 1
of the scripts layer to show that it now
contains some actions to be carried out when the movie gets
to the frame.
Its about time that you found out if the movie works. Select
Control and then Test Movie.
The movie will be compiled and then displayed in the Flash
player window. If everything is going according to plan, you
will see your text displayed in the text box. If there is
a problem with the ActionScript, a helpful window will appear
stating Flash's best guess as to the problem.
Adding hotspots
Click on frame 1 of the hotspots
layer.
Select Insert and then New Symbol...
In the Create New Symbol dialog, name the
symbol hotspot and make sure that Movie
Clip is selected before clicking on OK.
The stage disappears and is replaced by the symbol's edit
window.
Select the Rectangle Tool and set the line
property to transparent and the fill property to pale yellow.
Draw a small rectangle in the
edit area and then hold down the Ctrl key
as you tap E to return to the stage.
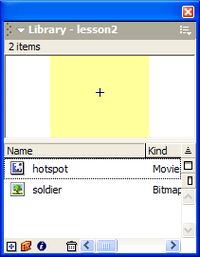
Press F11 to bring up the
library window. The hotspot symbol will be listed, along with
the image that you imported earlier.
Select the hotspot symbol and then drag it onto the stage.
You have created an instance or copy of
the symbol. It will act as an area on the image that will
respond to mouse actions such as rollovers and clicks.
Click on the hotspot copy on the stage enter shield
in the Instance Name box of its properties.
It isn't really necessary to name the copy like this since
you won't be referring to it using ActionScript but it helps
to keep track of the objects on the stage.
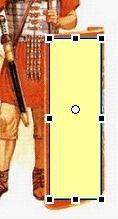
Drag the hotospot symbol over the shield on
the image and then select the Free Transorm Tool
from the toolbar.
Use the handles to change the size of the symbol until it
more or less covers the shield.
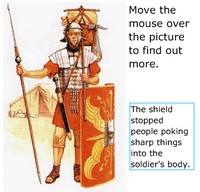
The symbol will detect movements of the mouse over the shield
and some ActionScript will handle the way that the movie responds.
Select the Arrow tool from the toolbar and
click on the shield hotspot to select it.
In the Properties pane, click on the Color Styles
list and select the Alpha property.
Drag the slider down to 0% and the hotspot will become transparent
so that the user won't see it over the shield.
Handling mouse events
Make sure that you have selected
the shield hotspot.
Press F9 to open the Actions pane.
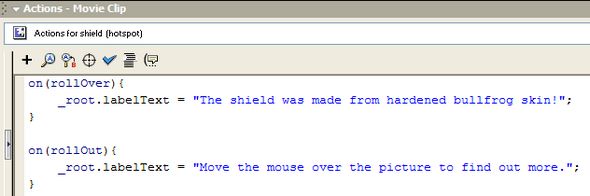
Enter the following ActionScript in the pane.
The actual text between the double-quotes is up to you!
Taking it from the top...
on (rollOver)
means - if the user moves the mouse over the symbol, do
the instruction inside the curly brackets ({}).
_root.labelText = "The shield...";
means - make the variable labelText contain the text inside
the double quotes. The semi-colon tells Flash that it is
the end of the instruction.
on (rollOut)
means - if the user moves the mouse out of the symbol's
boundaries, do the instruction inside the curly brackets.
_root.labelText = "Move the...";
resets the text to the instruction that was shown when
the movie started.
The addition of _root.
in front of the variable's name is used so that it can be
referred to in any part of the movie and Flash can access
its value.
Its about time that you found
out if the movie works. Select Control and
then Test Movie.
The movie will be compiled and then displayed in the Flash
player window. Good Luck!
And now your homework!
Have a go at finishing off the
movie by working out how to do the following.
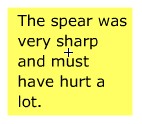
Add at least one more hotspot to the hotspots
layer so that the user gets some information when the mouse
passes over the spear.
Use the rotate function of the Free Transform Tool to
get the hotspot to line up properly.
Alter the properties of the dynamic text box to improve
the way the information is presented.
Create a new layer and put a border around the movie.
The next part of the lesson demonstrates some other ways
to produce a similar effect.
Using visibility
You are going to alter the lesson
2 movie so that separate information labels appear when the
user moves the mousepointer over parts of the image.
This also creates an opportunity to create a button that
will reveal all the labels at once.
Save the Flash file under a different name (e.g. lesson2b)
so that you can go back to the original and modify it at a
later date.
You will keep most of the original but double-click into
the Dynamic Text box to add a static instruction and convert
it to Static Text using its properties.
Unlock the background layer and nudge the
image into the centre of the stage before locking it again.
You will find that the hotspots
are now in the wrong place so nudge them back over the image.
If you can't find them all (since they are invisible), click
on the hotspots layer and they will appear with blue borders
around them.
Make sure that you are working on the labels
layer by clicking on its first frame and then select the text
tool from the toolbar.
Drag out a text box near to the shield.
Type some suitably informative text into it.
Set the box's properties to be static text.
Unfortunately you cannot alter the visibility of text boxes
so, the next step is to convert it to a symbol.
Check that the new label is the
only object selected and press F8.
Call the new symbol shieldlabel and set
its behavior to Movie Clip.
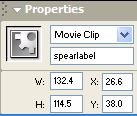
Use its properties to name the instance
of this new symbol shieldlabel. This will
be the one and only copy of the symbol on the stage and so
it is okay to use the same name as you used for the symbol.
You are naming it because it will be referred to in ActionScript
later on.
Click on frame 1 of the scripts
frame and press F9 to bring up the Actions
pane.
Delete the line that created the labelText
variable and insert the following in its place.
shieldlabel._visible = false;
When the movie runs, this instruction will hide the label
by making it invisible.
Test the movie to check that this happens.
Now you must adapt the ActionScript
that runs when the user moves the mouse over the shield hotspot
to make the label appear.
Click on the shield hotspot and press F9
if necessary to make the Actions pane appear again.
Edit the code so that it reads as shown below.
on (rollOver) {
_root.shieldlabel._visible = true;
}
on (rollOut) {
_root.shieldlabel._visible = false;
}
Test the movie and see if it does as it is
told!
All you have to do now is adapt the instructions to add labels
for the other hotspots you created and to make them appear
and disappear.
The next step is to create some buttons to reveal all the
labels and hide them again.
Creating buttons
Click on Insert
and then New Symbol...
Call the new symbol show and select the
Button behavior.
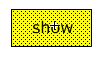
When the symbol editing window opens in place of the stage,
add a small static text box in the centre and enter show
into it. Rename the layer text.
Create a new layer, name it background.
Select the rectangle tool and use it to draw a border and
background around the text. This will define the area of the
button.
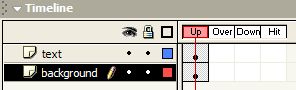
The timeline for a button is different in
that it only has four frames. Each frame defines what the
user sees when interacting with it.
Up - is the frame shown without any interaction and so contains
the image that the user sees most of the time.
Over - this frame is entered by the movie if the mouse passes
over the button.
Down - is the frame shown if the mouse button is pressed
over the button.
Hit - this frame defines the area of the button that can
be clicked on.
To keep this first button simple, you will
only define two states; Up and Over.
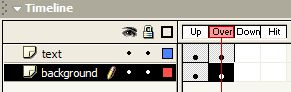
Insert a Keyframe in the Over frame for
both text and background
layers.
Now select the Over Keyframe in the background
layer and click on the filled rectangle on the editor. You
might have to click on a blank bit of editor first to deselect
the rectangle's border.
Use the properties pane to change the fill colour. This means
that the user will see the colour of the button change when
they pass the mouse over it. This will confirm that it is
a button and they will get an irresistible urge to click on
it!
Hold down the Ctrl key and
tap the E to finish editing the symbol and
to return to the stage.
I bet you've been wondering what the coltrols
layer was created for all that time ago.
Click on frame 1 of the layer and press F11
to open the Library and drag a copy of the show
button onto the stage in the controls layer.
To activate the button, you need
to add some ActionScript to it.
Click on the button and then press F9.
Enter this:
on (release) {
_root.shieldlabel._visible = true;
_root.spearlabel._visible = true;
}
If you have added other labels for other hotspots, include
the extra instructions inside the curly brackets.
In (fairly) plain language, it means -
If the user clicks on the button and then lets go, do the
instructions inside the curly brackets i.e. make the labels
visible.
Test the movie and check that the button changes colour in
response to the mouse and that the labels appear when you
click and release.
Finally, create a second button symbol.
The quickest way to do this is to duplicate
the symbol show. Right-click on the symbol
in the Library to do this. Call the copy hide
and then double-click on it in the Library to edit it and
alter the text in the button.
Add code to the new button to hide all the labels when it
is clicked.
An alternative is to use a new bit of ActionScript to test
if the labels are visible and hide them if they are. This
means that one button can both show and hide the labels.
if (_root.spearlabel._visible == true) {
_root.spearlabel._visible = false;
}
Have a go if you want but the ActionScript syntax in the
code is beyond the objectives of this lesson.
Creating tooltips
This last alternative gets the
labels to appear next to the mouse pointer when the user clicks
on part of the image.
Again, save the flash file under a different name (lesson2c).
The first step is to change the
label symbols so that they stand out against the image.
Open the Library using F11 and double-click
on one of the labels (e.g. spearlabel) to edit it.
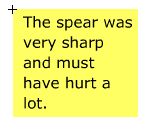
Use the rectangle tool to draw a borderless box around the
text filled with a suitable colour. When you select the tool,
the colors section of the toolbox allows you to select stroke
colour (border) and fill colour (inside fill).
Use the mouse to drag a selection box around the text and
rectangle and then nudge them both so that the top right hand
corner is lined up with the + mark on the editor background.
This sets the registration point of the symbol so its coordinates
refer to its top corner and not its middle.
Hold down the Ctrl and E
to close the editor.
Edit the other label symbols in
the same way.
You will find that you must then drag the labels back to
their original positions.
Next you need to alter the ActionScript
attached to the hotspots so the labels pop up near to the
cursor.
The popup will only appear if the user clicks on a hotspot
(so you might want to change the instruction on the movie).
The x coordinate of the label (_x) is made
the same as the mouse (_xmouse) with a small
addition to offset it away from the cursor. The y coordinate
is then altered in the same way. The label is then made visible.
Leave the on(rollOut) alone. It will tidy
up the screen, removing the popup once the user moves the
mouse.
Test the movie the check that this works before editing the
ActionScript in the hotspots for all the other labels.
If you run the movie and try the buttons,
you will find a glitch. The labels appear wherever they last
appeared.
To tidy this up, click on a label and look at the properties
pane. Note down the x: and y: properties to use as default
positions.
Now click on the show button and
add two lines above the instruction for each label setting
the x and y positions before they are made visible.