Drag and Drop
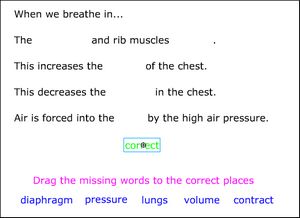
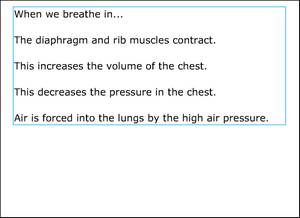
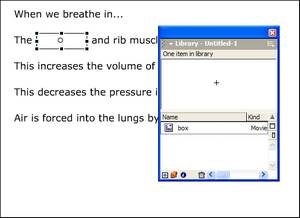
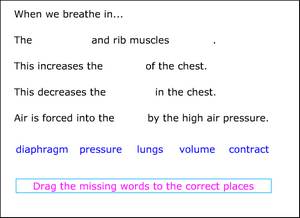
| Start Flash and arrange the panes as you like them. Remember that it is handy to see object properties. You will also need the actions pane quite a bit. Rename Layer 1 as text and create a static text box on the stage. Select a suitable font name and size for your text. Type your passage into the box including all the words that you intend to hide. |
 |
Now create a new layer and call it boxes. This will hold the targets for the words that the user is dropping. The targets will also hide the "missing" words so make sure that the layer is higher up in the layers list than text. |
|
Insert a new symbol (File - Insert Symbol...). Call it box and select the Movie Clip behavior. When the symbol editor appears, use the rectangle tool to make a rectangular box filled with white (or whatever colour you intend to use as the background) and with either a black hairline border or a white border depending upon if you want it to be visible to the user. Close the symbol editor and then press F11 to show the library - box should be listed. You can then drag an instance of it onto the stage in the boxes layer and use the Free Transform tool to adjust its size so it eactly fits over the first of the "missing" words. |
 |
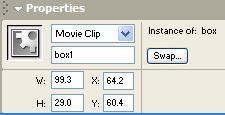
Carry on dragging instances of box onto the stage and resizing until all the "missing" words are hidden. Remember to keep checking that these objects really are being placed on the boxes layer. Now click on each box and add a name in the properties pane. It seems logical to call them box1, box2 etc. This is necessary as we will be adding code to the boxes and referring to them in the code. Flash needs a sort of handle for each object so that the code makes sense. |
 |
Note that this method of hiding the missing words creates differently sized targets and therefore helps the user place the words. A more demanding activity could be made by typing the text in a set of separate text boxes, missing out the words so that they don't have to be hidden. The text can then be arranged so that same sized boxes are placed in the gaps. This sort of activity can have several "red herring" words e.g. opposites as well. |
|
Create a new layer and call it words. Use the Text tool to create a static text box on the words layer on the stage. It would be sensible if you selected a different text colour but make sure that the text size is the same as for the original text. Enter the first word you hid in the text box. The user will drag this into the correct place to fill the gap. Now select the text and tap the F8 key to convert it to a new Movie Clip symbol called word1. Finish by naming this instance word1 so that we can refer to it in code later on. |
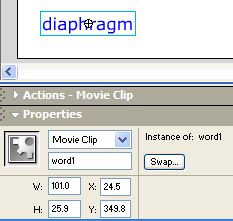 |
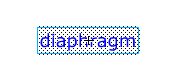
Unfortunately, the word symbols don't automatically have a background. This means that the user has to position the mouse over the letters very precisely when they want to drag them. The answer is to load each symbol up in the editor by selecting it and then pressing Ctrl and E. You can then use the Rectangle tool to draw a white box with a white border around the text. Leave the editor with Ctrl E to finish editing each word. |
 |
Create the rest of the missing words in the same way, naming them word2, word3 etc and arranging them, suitably mixed-up on the stage. If you are having trouble getting them lined up neatly, try the Modify and then Arrange options (but make sure that to stage is not selected). Add a suitable instruction to the stage in its own, new, named layer. This finishes most of the design part of the lesson. Its time to add some code. |
 |
| You need to attach some ActionScript code to each word so that it responds to the mouse and can be dragged and dropped. Click on one of the words to select it and then press F8 to bring up the actions pane. Enter the following code.
The first section is a function that responds to a mouse click over the word by moving the word with the mouse. When the mouse button is released, the second function is triggered and the word is dropped. |
|
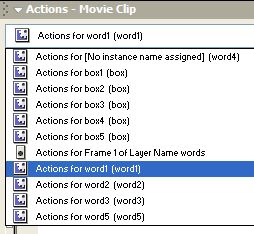
The top of the actions pane has a list box that lets you access the other objects in the movie to add code to them. Copy the code from the words actions pane and then use the list box to switch to each other word. You can paste the code in without any modification. Test the movie to find out if the words drag and drop as expected. If the output window appears when you run the movie, there is a problem with the code. This is usually due to a simple typing error. The message in the window will give you a clue what to do about it. |
 |
Although the words can be moved about the screen, there is no feedback if they are dropped in the right place. The next section suggests one way that this could happen. |
|
| To check if a word has been dropped in the right place, alter the code already attached to the word1 symbol. The new code is in blue.
When the word is dropped, the function checks if it is over box1. If it is a window will open giving the message. You will improve on this later but for now, test the movie to check the code. The logical next step is to get the function to give an alternative message if the word is dropped in a different place. Edit the code again by adding the instruction in blue.
If you test the movie, you will find that this solution has the problem that the output window that contains the message hides a lot of the screen and has to be closed if the user is to carry on. The next section will give feedback in a different way. |
|
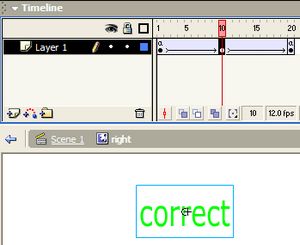
| Insert a new layer and call it feedback. Insert a new Symbol and call it correct. In the edit window for the new symbol, use the Text Tool to create a suitable message. In the symbol's timeline, create a Keyframe in frame 10. Use the Free Transform Tool to enlarge the message. Select the Arrow Tool and click in a frame between the two Keyframes. Use the properties pane to create a motion tween. This will make the message grow when it appears. Now insert a Keyframe in frame 20 and copy frame 1 onto it so that the text goes back to being small again. Create a motion tween between frames 10 and 20. The message will then grow and shrink when it appears. Finally click on Keyframe 1 and press F9 to enter an action that will take place when the symbol enters the frame. Enter stop(); in the action pane. Now move to Keyframe 20 and enter this._visible = false; into its action pane. All of this means that when the symbol appears, the message will grow and then shrink and then disappear. Hold down Ctrl and E to go back to the movie and drag the new correct symbol onto the feedback layer. |
|
All you have to do now is to edit the code attached to the word so that the correct symbol appears and runs rather like a mini movie when the word is dropped in the right place. Select the word and bring up its action pane. Edit the functions so that they look like this with the changed instructions in blue.
Finish the job by attaching the code to each word. It is probably easier to copy the code and then use it to replace the existing instructions for each word rather than editing them. Remember that if (this.hitTest(_root.box1) == true){ will have to be altered so the correct target is checked for each time e.g. box2 etc. When you test the movie all should be well apart from the fact that the message starts off visible and only disappears after the user has got a word right. In the main movie timeline, create a scripts layer right at the top of the list and add the following line of code to the actions pane for Keyframe 1 in the layer.
This hides the message as the movie starts. Hopefully the finished movie works a bit like this. You can download the .fla file here to compare it with your own!
This solution to this type of activity is fairly simple in that it doesn't allow the user to score their efforts or rest the words for another go. The next part of the lesson is all about taking a ready-made Flash movie that does these things and shows you how to adapt it for your own activity. |
|
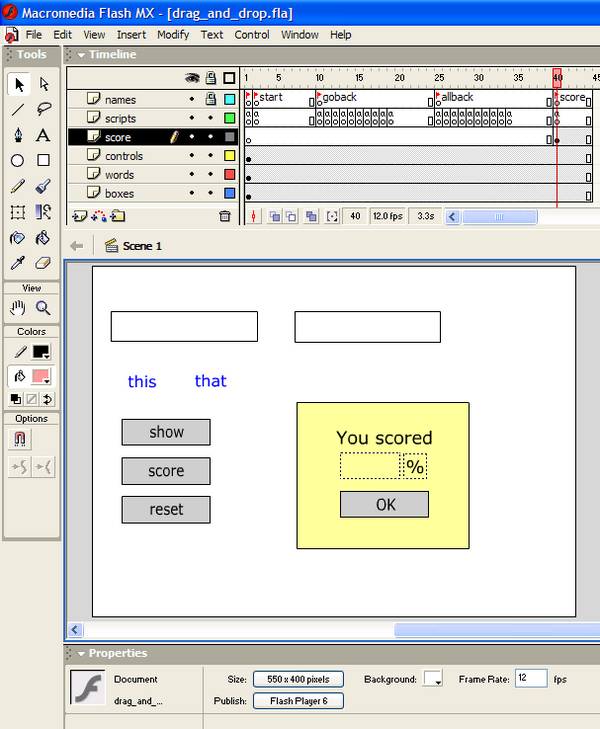
| In this part of the activity, the idea is to adapt a flash file that has most of the basic drag and drop tools already in place. Download the flash file from here and then open it. |
|
 |
|
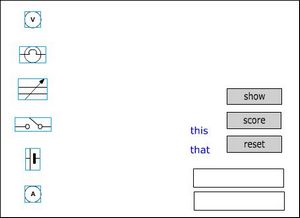
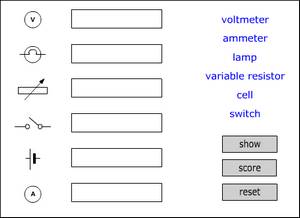
The file has two objects (words) to drag and drop and two destinations. It also has a simple scoreboard for feedback. The next step will take you through creating more items and then linking them to the code that already exists so that you have a matching pairs activity. Before you go any further, find or create a few (say 5-6) small images to which the user will match names or descriptions. |
|
| Create a new layer and call it background. Drag the layer so that it is at the bottom of the stack (below the boxes layer). Click on frame 1 in your background layer and then import your images, one at a time to the layer. You can do this by scanning a document into your favourite graphic editor and then copy and paste images directly onto the stage. Arrange your images so that they have a space beside them for their matching descriptions or names. |
You might want to drag the other objects away from the images at the same time. |
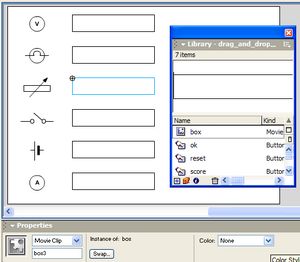
Now position the two boxes that were there at the start beside the first two images. Next open the library by pressing F11 and drag some more boxes onto the boxes layer and arrange them beside the rest of the images. The first two boxes should have been named box1 and box2. Select each new box and in its properties, name it - box3 etc. Naming the boxes enables Flash to refer to the symbols in code. The boxes might not be the appropriate shape or size but leave them as they are for now until you have created the text labels. |
 |
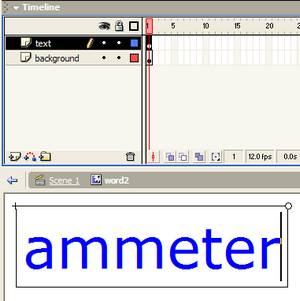
Click on one of the existing words and hold down Ctrl and E to edit it. The word symbol has two layers, one for the text and the other for the background that gives the mouse something to click on between the letters. Click on the first frame of the text layer and then edit the text to contain the words that you want (the image shown was zoomed it). Click on the first frame of the background layer so that this is selected. Select the Free Transform Tool and use it to drag the background rectangle to cover the whole of the text. |
 |
Click on the link to Scene 1 to finish editing the label and go back to the main timeline. |
|
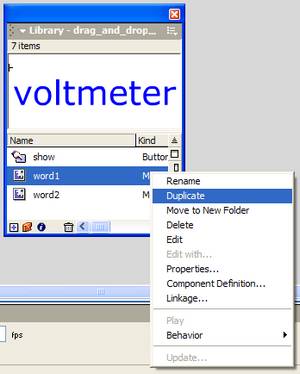
Repeat the exercise with the second word. Now you will need to create text symbols to match with the other images. One quick way to do this is to open the library and right-click on one of the existing word objects. Choose Duplicate from the menu that appears. In the Duplicate Symbol dialog, name the new symbol word3 and then OK. The new symbol will be placed in the library and it can then be dragged to the words layer, edited and positioned. Repeat this until you have text labels to match with all the images. Finally, click on each symbol inturn and name it in the properties pane word3, word4 etc. |
 |
| Tidy up the stage so the objects are arranged appropriately and check that the boxes are the right size for the labels. If you need to change the size of a box, right-click on it and choose scale from the menu. The box will then have handles to drag it bigger or smaller. You have now done all the hard work. All that remains is to add some extra code to get the activity running. Test the movie to see how it looks. You should notice that two of the labels behave as expected as they already have the code referring to them. |
 |
Click on frame 1 of the scripts layer and press F9 to open the actions pane. Check that you have selected Expert View so that you can scroll through the existing code and add things to it. The code is more or less prepared but needs to be modified to take into account the number of objects in the activity. The code below shows existing instructions in black and additions in blue. Text in green is intended as a helpful instruction, it must not be added to the code. |
|
// ** you will edit the code below this point ** // sets up an array for the word destinations (the boxes) //sets up array for the words // sets the reset position of all words to their starting position // sets up an array for the correct answers // ** you should not change any code below this point ** |
|
All you have to do now is make all the words draggable. Click on either word1 or word2 and open the actions pane. Copy the code (shown below) and then paste it into the actions pane for each of the other words. on (press) { on (release) { Test the movie and check if all the objects do what you expect. |
|